HA Filler Combination Treatments: Best Practices for Lips, Cheeks, and Under-Eye
TL;DR: Learn how to safely and effectively perform HA filler treatments across multiple facial areas to maximize aesthetic outcomes and patient satisfaction.
Performing HA filler combination treatments: lips, cheeks, and under-eye in one session creates balanced results that single-area work misses. When you plan multi-area treatments correctly, you get three things: harmonious proportions, efficient sessions, and better value. You can plan a multi-area session in under 20 minutes using the approach below.
Combination planning involves determining which areas need volume versus lift, confirming that product selection matches each zone, and setting hard limits on total volume. The steps ahead cover treatment sequence, technique tweaks per area, and safety checks.
Results depend on one thing: treat facial areas as connected parts, not isolated zones. Adding volume to one spot without balancing nearby areas creates problems. Read this before your first combination session.
Planning Combination Treatments

Look at the whole face before diving into specific spots. Some people need midface volume to support the lower face. Others need lower face work to balance strong cheekbones. Ask what bugs them most, then explain how treating connected areas improves harmony.
Study bone structure and where fat sits. High cheekbones need a different placement than flat midfaces. Deep tear troughs with flat cheeks often improve when you treat cheeks first. The eye HA filler selection changes based on whether the patient has good cheek support or needs midface volume first.
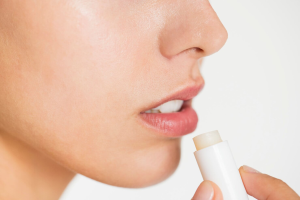
Lips need soft, spreadable filler that moves with expression. Cheeks need a firmer product that holds structure. Under-eye needs a very fine, smooth filler that won’t show through thin skin. Don’t use the same product everywhere.
Treatment order matters. Start with structural areas, then move to refinement. Treat cheeks first to restore midface volume and lift. This often reduces tear trough depth before you touch those spots. Move to the under-eye next while swelling is low. Finish with the lips since they swell the most.
Volume limits keep results natural. Most practitioners stay within 3-5 mL total per session. Going over increases swelling and the risk. If a patient needs more, stage treatments are two to four weeks apart.
Injection Techniques per Area
- Lips: Start at the border using small deposits just below the skin surface. This defines the edge without looking overfilled. Move to the body, injecting slightly deeper using threading or a small puncture technique. Threading means advancing the needle while injecting in a line. Keep the needle angle shallow, around 10-30 degrees. Build volume across several passes. In combination sessions, underfill the lips slightly, as facial balance becomes clearer once all areas are done. You can add more at the two-week touch-up. Watch for asymmetry by checking both sides often. Total lip volume typically stays under 1 mL to balance with other work.
- Cheeks: Place the product on the bone using deep placement. This means directly on top of the membrane covering the bone. This creates lift that improves multiple areas at once. Entry points sit to the side of an imaginary line drawn from the pupil center. The HA cheek filler for lift builds structure when you deposit small amounts along the cheekbone, then massage gently. Use a cannula for broader coverage with fewer entry points. This reduces trauma and lets you fan product across a wider area. Deposit 0.2 to 0.3 mL per spot when placing on bone. Compare both sides constantly. Skip overfilling the front cheek near the nose. Focus volume on the high point.
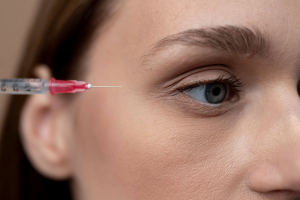
- Under-Eye: Use a blunt-tip cannula when possible. Enter from the side near the cheek, advancing slowly along the bone around the eye socket. The bone circling the eye socket is called the orbital rim. Place the product directly on the bone. This deep placement prevents the Tyndall effect, which causes the blue color from the filler to appear too shallow. Inject tiny amounts, typically 0.01 to 0.03 mL per spot. In combination treatments, the under-eye area often requires less volume than in standalone sessions. Cheek lift reduces tear trough depth, so reassess how much you actually need after midface treatment. Spread the product with a gentle massage. Stop often to check results from multiple angles.
Safety Considerations in Multi-Area Treatments
Each injection site adds trauma, so total swelling exceeds single-area work. Apply ice before and between areas to keep vessels constricted. Constriction means vessels narrow, reducing blood flow and bruising risk.
Have patients skip blood thinners for one week before when medically safe. This includes aspirin, ibuprofen, fish oil, and vitamin E. Even with precautions, expect more visible bruising.
Use needles for precise lip work where you need exact placement. Switch to cannulas for cheeks and under-eye, where larger vessels pose a higher risk. Cannulas push vessels aside instead of puncturing them.
Some practitioners use needles throughout, but inject more slowly and check for blood before depositing product. Checking means pulling back on the syringe to see if blood appears. If it does, you’ve hit a vessel and need to move.
Document consent and treatment plan. Note which areas you’re treating, products used with lot numbers, total volume per area, and photos from multiple angles. Make sure patients sign forms saying they understand the procedure and recovery.
Patient Consultation and Education

- Walk patients through how treating multiple areas creates better harmony. Show before-and-after photos of previous multi-area patients with similar features.
- Be honest about recovery. Multi-area treatments lead to more swelling and longer downtime than treating a single zone. Most patients experience significant swelling for 3 to 5 days, with final results visible after 2 weeks.
- Combined treatments improve balance and restore proportions, but they don’t stop aging or match the results of surgery. Results last 6 to 18 months, depending on the areas treated and individual metabolism.
- Post-treatment care should be written down. Patients avoid touching treated areas for six hours, skip hard exercise for 24 hours, and sleep elevated for two nights. Ice helps during the first 24 hours. Arnica gel may reduce bruising starting on day two.
- Schedule follow-up two weeks out to check results and do touch-ups if needed. Many clinics include one complimentary touch-up in multi-area pricing.
Optimizing Results Across Areas
Step back often to check overall balance. The volume in one area affects how nearby areas appear. Full lips with flat cheeks can look bottom-heavy. Prominent cheeks without adequate under-eye treatment can emphasize hollowing.
Take photos throughout from the same angles. Compare them to baseline images to track how proportions shift as you add volume. This prevents overtreatment and helps spot asymmetry early.
Don’t touch up until 2 weeks post-treatment. Swelling can take up to 4 weeks to fully resolve, and filler can keep settling for up to 4 weeks. What looks underfilled at one week often looks perfect at three weeks.
Track how long results last in each area for individual patients. Lips typically break down filler faster than cheeks. Under-eye filler often lasts longest since there’s less movement there. Document these patterns in charts. When patients return for maintenance, you’ll know which areas need retreatment.
Glossary
- HA Filler: A gel you inject to plump up skin and fill lines. Your body already makes hyaluronic acid, so this stuff fits in naturally and breaks down on its own over time.
- Facial Contouring: Reshaping parts of your face by putting filler in specific spots. You can add definition, create lift, or fix proportions that feel off.
- Layering Technique: Building up filler bit by bit in different depths instead of dumping a bunch in one go. This makes the results look way more natural.
- Cannula vs. Needle: A cannula has a blunt, rounded tip that nudges blood vessels out of the way. A needle is sharp and precise, but more likely to nick something.
- Multi-Area Treatment: Working on several parts of the face in the same appointment. Lips, cheeks, and under-eye together are a popular combo.
References
Urdiales-Gálvez, F., et al. (2021). Management of tear trough with hyaluronic acid fillers. PMC. https://pmc.ncbi.nlm.nih.gov/articles/PMC8127324/
Lipko-Godlewska, S., et al. (2021). Whole-face approach with hyaluronic acid fillers. PMC. https://pmc.ncbi.nlm.nih.gov/articles/PMC7901566/
Converset, S., et al. (2025). Lip enhancement and perioral area correction with new hyaluronic acid fillers. Aesthetic Surgery Journal Open Forum. https://academic.oup.com/asjopenforum/article/doi/10.1093/asjof/ojaf101/8243880
Dermatouch RN. (2025, May 9). Biostimulators and HA dermal fillers. https://www.dermatouchrn.com/ha-billers-and-biostimulators-at-dermatouch-rn/
Plasticsurgerykey. (2022, February 22). Eyelid and periorbital dermal fillers. https://plasticsurgerykey.com/eyelid-and-periorbital-dermal-fillers/